Welcome to our new site. We hope you enjoy it. We are in our final testing to make sure everything is ready for you to come and SHOP. Look around all you like, we'll be officially open over here 12/26/24!

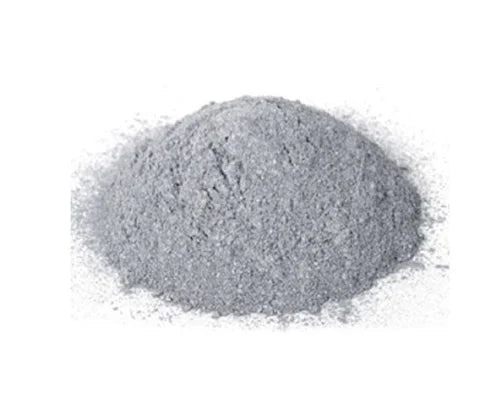
Smoothset Dry Kiln Mortar

Description

Dry Mortar Mixing Instructions

Storage

Dry Mortars should be stored in a dry, well-ventilated area and held off the floor on pallets. Storage temperature is not a consideration as long as the castable is in the desired temperature range prior to casting.

Water

The water used for mixing should be clean and of drinkable quality – potable water. Since the amount of water added to the dry mortar does more to affect the properties than any other factor it must be accurately measured. In the table below are the approximate water contents that would be required to attain proper mortar consistency for troweling or dipping.

Water Content for Smoothset Dry Mortar
Consistency Avg. Recommended
Trowel Consistency 29% Water
Dipping Consistency 50% Water
Pounds per 1000 straight bricks 160 - 180 pounds dry mortar

Temperature

Ambient conditions as well as mixing water and material temperature can significantly affect the consistency of the mortars. In very cold conditions, the bags should be kept in warm storage, though not less than 60°F, for at least 48 hours before use. If the material temperature is below 60°F there will be an increased water demand for placement and will reduce strength properties.

Mixing

Mixing must be done in a paddle type mixing of sufficient capacity and energy to ensure thorough mixing. The level of dry material in the mixer should not be above the center paddle shaft. Also the paddles, which put a high level of work energy into the mixing operation, must be made of steel and have no more than 0.6” clearance from the mixer walls. This assures a rapid, thorough mix and the mixers virtually clean themselves from batch to batch.

Mixer and tools used must be clean. Some substances like lime, Portland cement or calcium aluminate castable can cause problems with the mixing and consistency of the mortars.

Add one half to three quarters of the mixing water to the mixer and begin its operation. Then add the dry mortar in full bag lots. See the table above. Add the remaining amount of recommended water during the first minute of wet mixing. Continue wet mixing for at least 20 minutes minimum. Depending on the speed of the mixer it might take up to 30 to 45 minutes for the mortar and water to be completely mixed.

After mixing for the recommended times, turn off the mixer and take a sample in your hand and feel for lumps of clay that have not been fully dispersed. If you do find some, continue mixing until all the lumps of clay have been eliminated. If too much water has been added and it is too thin some additional dry mortar can be added to change the consistency to what is needed.

Remove the wet mixed mortar out of the mixer and place it in buckets with lids or water proof containers that can be covered with plastic to keep the moisture in the mortar. The mortar should be allowed to set for 24 hours to provide the properties required for the bonding of the brick. This time allows the microscopic clay agglomerates to break down to the ultimate crystals with the action of the sodium silicate that is added to the mortar. This is a process called ‘Slaking’.

After the 24 hour ‘Slaking’ of the mortar, place it back into the paddle mixer and mix for another 20 minutes. After this additional 20 minutes mixing take a sample from the mixer and determine if it is the proper consistency for the troweling or dipping consistency that is required. If it is not, then add 2 to 4 % more water in 1% increments. After the 1% water is added mix for at least 5 minutes. Continue increasing the water until the proper consistency is reached. Place the mortar in the containers used for ‘slaking’ and begin using the mortar. Remember to keep the mortar covered to keep it from drying out. If it does dry out, the surface will become like a film of plastic. Remix the mortar with a paint mixer attached to a high speed drill. It might be required to add a cup of water to help in remixing the mortar.

Product form

Dry Mortar Mixing Instructions Storage Dry Mortars should be stored in a dry, well-ventilated area and held off the floor... Read more

SKU: RMKCEMENTDRY

$4.00

Out of stock

    Description

    Dry Mortar Mixing Instructions

    Storage

    Dry Mortars should be stored in a dry, well-ventilated area and held off the floor on pallets. Storage temperature is not a consideration as long as the castable is in the desired temperature range prior to casting.

    Water

    The water used for mixing should be clean and of drinkable quality – potable water. Since the amount of water added to the dry mortar does more to affect the properties than any other factor it must be accurately measured. In the table below are the approximate water contents that would be required to attain proper mortar consistency for troweling or dipping.

    Water Content for Smoothset Dry Mortar
    Consistency Avg. Recommended
    Trowel Consistency 29% Water
    Dipping Consistency 50% Water
    Pounds per 1000 straight bricks 160 - 180 pounds dry mortar

    Temperature

    Ambient conditions as well as mixing water and material temperature can significantly affect the consistency of the mortars. In very cold conditions, the bags should be kept in warm storage, though not less than 60°F, for at least 48 hours before use. If the material temperature is below 60°F there will be an increased water demand for placement and will reduce strength properties.

    Mixing

    Mixing must be done in a paddle type mixing of sufficient capacity and energy to ensure thorough mixing. The level of dry material in the mixer should not be above the center paddle shaft. Also the paddles, which put a high level of work energy into the mixing operation, must be made of steel and have no more than 0.6” clearance from the mixer walls. This assures a rapid, thorough mix and the mixers virtually clean themselves from batch to batch.

    Mixer and tools used must be clean. Some substances like lime, Portland cement or calcium aluminate castable can cause problems with the mixing and consistency of the mortars.

    Add one half to three quarters of the mixing water to the mixer and begin its operation. Then add the dry mortar in full bag lots. See the table above. Add the remaining amount of recommended water during the first minute of wet mixing. Continue wet mixing for at least 20 minutes minimum. Depending on the speed of the mixer it might take up to 30 to 45 minutes for the mortar and water to be completely mixed.

    After mixing for the recommended times, turn off the mixer and take a sample in your hand and feel for lumps of clay that have not been fully dispersed. If you do find some, continue mixing until all the lumps of clay have been eliminated. If too much water has been added and it is too thin some additional dry mortar can be added to change the consistency to what is needed.

    Remove the wet mixed mortar out of the mixer and place it in buckets with lids or water proof containers that can be covered with plastic to keep the moisture in the mortar. The mortar should be allowed to set for 24 hours to provide the properties required for the bonding of the brick. This time allows the microscopic clay agglomerates to break down to the ultimate crystals with the action of the sodium silicate that is added to the mortar. This is a process called ‘Slaking’.

    After the 24 hour ‘Slaking’ of the mortar, place it back into the paddle mixer and mix for another 20 minutes. After this additional 20 minutes mixing take a sample from the mixer and determine if it is the proper consistency for the troweling or dipping consistency that is required. If it is not, then add 2 to 4 % more water in 1% increments. After the 1% water is added mix for at least 5 minutes. Continue increasing the water until the proper consistency is reached. Place the mortar in the containers used for ‘slaking’ and begin using the mortar. Remember to keep the mortar covered to keep it from drying out. If it does dry out, the surface will become like a film of plastic. Remix the mortar with a paint mixer attached to a high speed drill. It might be required to add a cup of water to help in remixing the mortar.

    Resources

    Recently viewed products

    © 2024 Brackers Good Earth Clays, Powered by Shopify

      • American Express
      • Apple Pay
      • Diners Club
      • Discover
      • Google Pay
      • Mastercard
      • PayPal
      • Shop Pay
      • Venmo
      • Visa

      Login

      Forgot your password?

      Don't have an account yet?
      Create account