Bracker's Good Earth Clays
Bracker's Good Earth Clays Kiln Gloves [raku gloves] - pair
$18.00
Bracker's Good Earth Clays Latex Resist
WHEN USED AS RESIST FOR CERAMIC APPLICATION Latex resist is pre-mixed and ready to use as is, although you may thin it with water if necessary. Mix a little liquid dish soap with water and put into a container. Before using latex, wet your brush in the soapy water to help brushability and cleanup (after you’re finished, you can use the same soapy water to clean your brushes). Don’t use “good” brushes! Latex will eventually ruin your brushes, even if you take extraordinary care when cleaning up. Don’t wear good clothes when using latex. It will stain and won’t wash out of clothing. Apply one (1) thick coat of latex when used to resist glazes. Thinner coats may be difficult to remove and could leave little bits of latex on your piece. The latex dries from the bottom up, so when the top surface of the latex starts to turn yellow, you can lift it up. Drying time will vary from about 15 minutes to two hours, depending on temperature and humidity (Pieces can be placed in the sun or in front of a fan to accelerate drying time). Use a needle tool to gently lift an edge of the latex, then pull gently but firmly with your fingers to remove the latex. Make sure to wear a dust mask when removing the latex. Dry glaze particles on top of the latex can create a lot of dust when pulling it off. On some occasions, the latex resist can pull up at the edges if it is left on too long, perhaps overnight or longer. (If the piece with the latex on it is already glazed, this isn’t a big issue, but don’t create detailed latex resist patterns and then plan to apply the glaze the next morning.) Although it is not recommended, latex can be left on a piece during the firing (not large areas, but little bits and pieces that might not pull off when the latex is applied too thin), but it leaves an ashy residue, and it is not known if it produces harmful or toxic fumes. Tips from Marie Deborah Wald, longtime latex resist user (paraphrased & compiled by Bracker’s).
$22.00 - $150.00
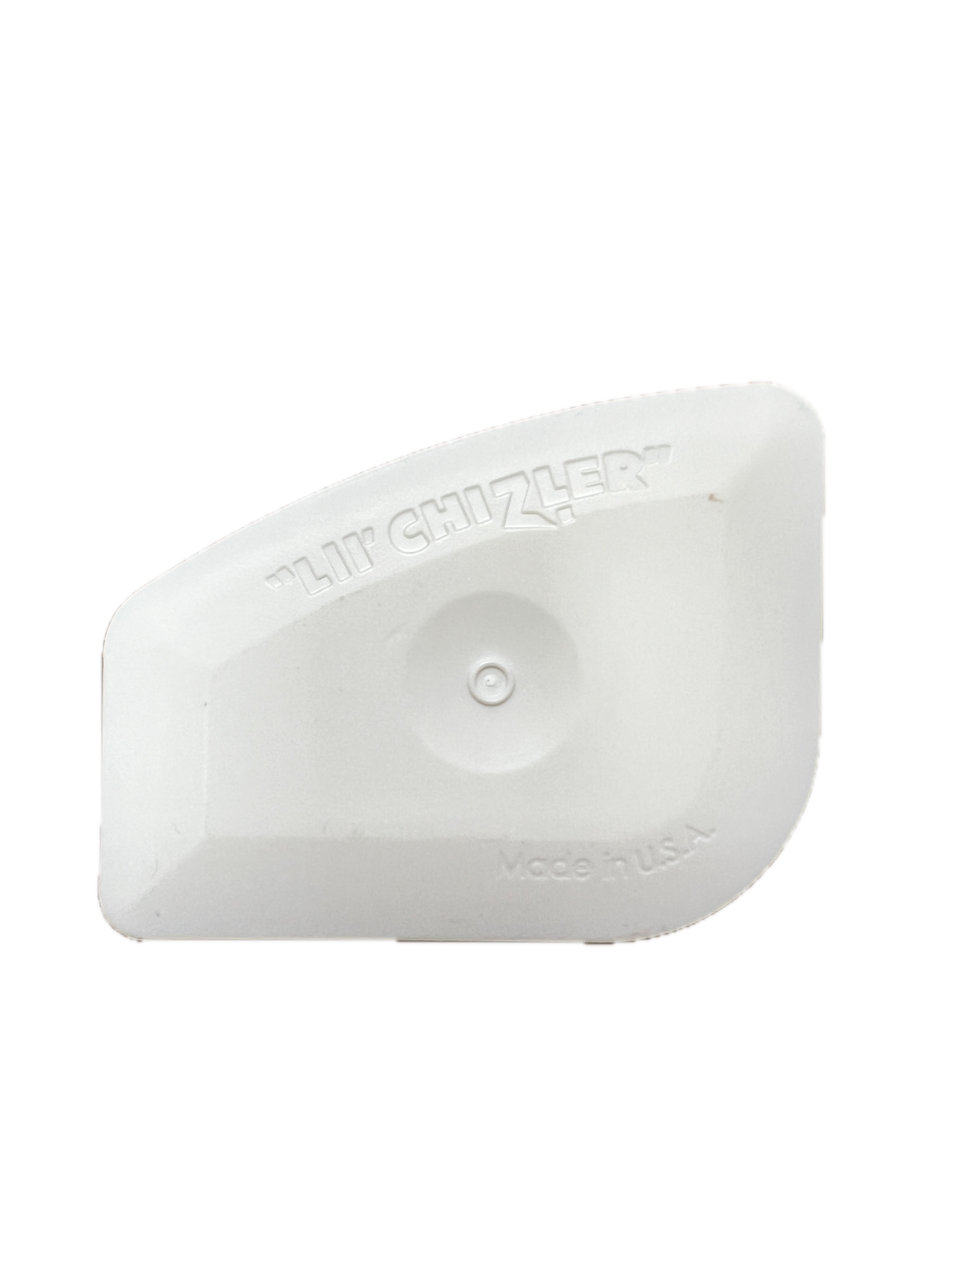
Bracker's Good Earth Clays Lil' Chizler
One of Anne W. Bracker's top 5 favorites!
$2.50
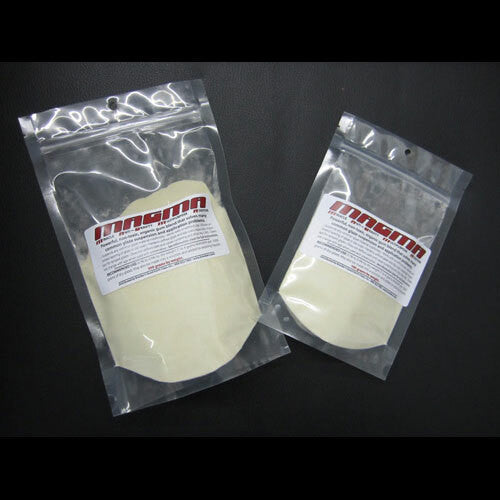
Bracker's Good Earth Clays MAGMA - Miracle Anti-Gravity Multipurpose Additive
downloadable information sheet No more hard settled glazes, no more powdery glaze coatings, no more peeling glazes. All your suspension and application problems solved! Suspends ANY common glaze material, including dense granular materials, indefinitely. Works with or without clay - even zero clay formulations. Allows glaze carving and sgraffito without chipping. Allows unlimited layering of glaze or slip coats. Hardens unfired glaze and slip coatings. Does not change with age (requires preservative*). Does NOT deflucculate and cause curtaining and drips like CMC does. Almost completely burns away, leaving fired glaze or slip unaffected. For brush application, smooths application and hardens the coat like CMC but allows heavier brush loading and thicker coats than CMC. GLAZE/SLIP TYPE 100g batch (brushing) 100g batch 1000g batch 10,000g batch zero clay formula 0.7g 0.6g 6g 60g typical formula (10% clay) 0.6g 0.4g 4g 40g high clay formula 0.5g 0.3g 3g 30 For brushing glazes, increase recommendations by 0.1%. As a clay plasticizer, try 0.1% MAGMA. Two simple ways to add it to your slip or glaze: LIQUID GLAZE Add 40 grams MAGMA and 4 grams Copper Carbonate (CuCO3) to 8 ounces hot water. Wait approximately 6 hours. It will look like green goop. Add a little MAGMA gel to your liquid glaze - start with 1 teaspoon of MAGMA gel per pint of glaze. You can always add a more if you need it, but it’s better to err on the side of caution because MAGMA increases the drying time of the glaze. DRY GLAZE Determine appropriate quantity of MAGMA. Mix MAGMA powder with other dry ingredients. Add 0.04% (of total batch weight) Copper Carbonate (CuCO3) as a preservative unless Copper Carb is already included in the recipe. Example: 0.4g CuCO3 per 1000g dry glaze Add dry mix to normal amount of [hot] water for glaze batch. Glaze will be a little thicker than you are used to. Wait a few hours before sieving. Always glaze the outside surface first when using a glaze with MAGMA or any other additive. Recommended preservative: If you plan to store glaze mixed with water for more than one week, add Copper Carbonate (CuCO3), 0.04% of total dry batch (0.4g CuCO3 per 1000g dry glaze). The vast majority of glazes will not show any coloration from this small amount of copper, but it will prevent the gum from rotting. Test before mixing a full batch. CAUTION: MAGMA will dramatically thicken any glaze it is added to. Thinning the glaze to a “normal” consistency will cause very thin coats. MAGMA containing glazes must have more viscosity than typical glazes. MAGMA glazes also take more time to “dry” (the water moves into the bisque slower) after dipping or spraying. If high viscosity glazes will not work for you, and/or slow setting or drying glazes will not work for you, you should not use MAGMA.
$6.00 - $50.00
Bracker's Good Earth Clays Mini Slip Dropper
$2.00
Bracker's Good Earth Clays Mustard Spoon
Small wooden mustard spoon.
$1.00 $0.75
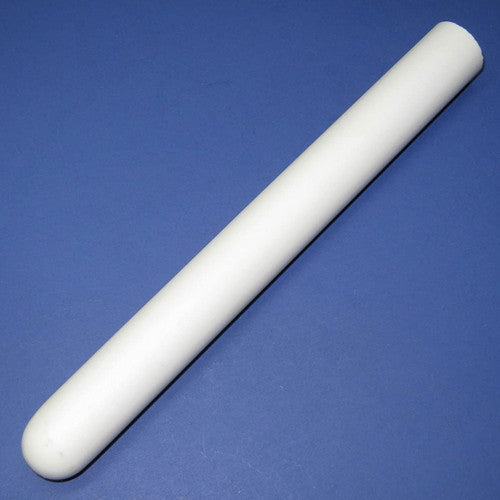
Bracker's Good Earth Clays Protection Tube for 12 Thermocouple
Porcelain Protection Tube - fits on the 12" long, 8 gauge thermocouple.
$24.15
Bracker's Good Earth Clays Red Dragon 100,000 BTU Propane Torch
Information from the manufacturer The WEED DRAGON is the perfect propane torch kit for home and garden use. They've regulated the flame and BTU down for homeowners who don't need the power of a farm torch and they've even assembled it. This torch kit is still plenty powerful for lots of tough jobs all year long and generates heat up to 2,000° F. The 100,000 BTU Weed Dragon quickly hooks up to any refillable propane tank (barbeque cylinders work great) and even comes with a hand-tighten tank fitting (you don't even need a wrench). Overall length from torch bell to back of handle is 27 1/2". 100,000 Burner Kit includes 100,000 BTU Torch with plastic grip 10' U.L. Listed LP Gas Hose Hand Tighten Excess Flow P.O.L. Fitting Adjustable Needle Valve Spark Lighter Pipe Thread Compound VT 2-23 Vapor Torch Specifications Maximum Capacity 100,000 BTU/hr Normal Operating Pressure 18 P.S.I. Operating Pressure Range 5 - 25 P.S.I. Approximate Flame Temperature 2050 Degrees F Fuel Consumption @ 30 P.S.I. 2.25 lbs/hr Max Fuel Consumption 4.6 lbs/hr Fuel Inlet 1/4" NPT Torch Bell Diameter 2" Handle Length 23" Overall Torch Length 27 1/2" Oxygen is necessary to have a hot flame (and therefore a hot atmosphere throughout the kiln). By covering/plugging the peep holes completely, you are drastically limiting your temperature capacity in the kiln. If you need to adjust the drafting of the kiln, the most you should do is cover 1/2 of one or two peep holes. Never more than that. When we raku at Bracker's (as seen in this slideshow), we fire all day long for a huge group of people, so we use a 100# cylinder and fire 6-8 cycles for each kiln setup (we usually have 3-5 kiln setups firing at the same time off separate tanks). Most people wouldn't do quite that much firing. We have two different sized burners available. The one you might see in the photos of us raku firing is the larger burner with a 500,000 BTU capacity and is appropriate for 40# or 50# cylinders and up. The other burner is a 100,000 BTU burner that is more appropriate for the smaller propane tanks like the 20# cylinders available at a hardware store (Home Depot, Lowes, etc) or convenience store. From our experiences, stay away from the Blue Rhino brand tanks - they're might be fine for the occasional backyard grill, but they aren't very good for raku firing. The small burner is also appropriate for 30# cylinders and occasionally 40# cylinders. A local propane dealer (propane is also referred to as "LP" or liquid propane; search the yellow pages or online for propane and/or natural gas supply, grill-oriented businesses, or welding supply businesses) is a much better source for propane tanks and propane refills than the hardware or convenience stores that offer those tank exchange cages. Many times you can either rent or purchase a tank. When you own your own tank, you just need to take it in for refills and are only charged the cost for the amount of propane it takes to fill-up the tank. The propane dealer will also make sure that you have the correct safety valves and can help if you need a pressure regulator valve or, if necessary, a high altitude valve (usually not an issue unless you're on a mountain). Either of the burners paired with the appropriately sized propane tank will work just as well as the other. The big difference is capacity. Is raku firing an occasional thing you do or is it a significant part of your work? If you plan to raku for a couple of hours once in a while, a 20#, 30#, or 40# cylinder with a 100,000 BTU burner is appropriate. If you raku frequently and/or it's inconvenient to get a propane refill, a 50# or 100# cylinder and the 500,000 BTU burner might be more suitable. The burners we sell are Red Dragon torches (they market them for burning weeds, among other things). Both of these burners are natural draft burners. It's NOT a forced-air burner (the air force would be likely to blow your pots over during this type of firing and is completely overkill for what a potter wants to accomplish in a raku firing).
$150.00
Bracker's Good Earth Clays Red Dragon 500,000 BTU Propane Torch
Information from the manufacturer This is the original Red Dragon Torch Kit and continues to be the most popular torch kit in North America. This 500,000 BTU/hr torch is our most powerful vapor torch and can handle the toughest jobs all year long. A great overall utility torch for years and years of service. Perfect for Farm and Ranch, Construction, Road Crews, Grounds Maintenance, Industry and More. Runs on tank pressure. No regulator required. Torch has a 3" diameter bell and a total length of 33 1/2". 500,000 Burner Kit includes 500,000 BTU VaporTorch 10' U.L. Listed LP Gas Hose Hand Tighten Excess Flow P.O.L. Fitting Adjustable Needle Valve Spark Lighter Pipe Thread Compound VT 3-30 Vapor Torch Specifications Maximum Capacity 500,000 BTU/hr Normal Operating Pressure 30 P.S.I. Operating Pressure Range 5 - 90 P.S.I. Approximate Flame Temperature 2050 Degrees F Fuel Consumption @ 30 P.S.I. 10.13 lbs/hr Max Fuel Consumption 23.3 lbs/hr Fuel Inlet 1/4" NPT Torch Bell Diameter 3" Handle Length 28" Overall Torch Length 33 1/2" Oxygen is necessary to have a hot flame (and therefore a hot atmosphere throughout the kiln). By covering/plugging the peep holes completely, you are drastically limiting your temperature capacity in the kiln. If you need to adjust the drafting of the kiln, the most you should do is cover 1/2 of one or two peep holes. Never more than that. When we raku at Bracker's (as seen in this slideshow), we fire all day long for a huge group of people, so we use a 100# cylinder and fire 6-8 cycles for each kiln setup (we usually have 3-5 kiln setups firing at the same time off separate tanks). Most people wouldn't do quite that much firing. We have two different sized burners available. The one you might see in the photos of us raku firing is the larger burner with a 500,000 BTU capacity and is appropriate for 40# or 50# cylinders and up. The other burner is a 100,000 BTU burner that is more appropriate for the smaller propane tanks like the 20# cylinders available at a hardware store (Home Depot, Lowes, etc) or convenience store. From our experiences, stay away from the Blue Rhino brand tanks - they're might be fine for the occasional backyard grill, but they aren't very good for raku firing. The small burner is also appropriate for 30# cylinders and occasionally 40# cylinders. A local propane dealer (propane is also referred to as "LP" or liquid propane; search the yellow pages or online for propane and/or natural gas supply, grill-oriented businesses, or welding supply businesses) is a much better source for propane tanks and propane refills than the hardware or convenience stores that offer those tank exchange cages. Many times you can either rent or purchase a tank. When you own your own tank, you just need to take it in for refills and are only charged the cost for the amount of propane it takes to fill-up the tank. The propane dealer will also make sure that you have the correct safety valves and can help if you need a pressure regulator valve or, if necessary, a high altitude valve (usually not an issue unless you're on a mountain). Either of the burners paired with the appropriately sized propane tank will work just as well as the other. The big difference is capacity. Is raku firing an occasional thing you do or is it a significant part of your work? If you plan to raku for a couple of hours once in a while, a 20#, 30#, or 40# cylinder with a 100,000 BTU burner is appropriate. If you raku frequently and/or it's inconvenient to get a propane refill, a 50# or 100# cylinder and the 500,000 BTU burner might be more suitable. The burners we sell are Red Dragon torches (they market them for burning weeds, among other things). Both of these burners are natural draft burners. It's NOT a forced-air burner (the air force would be likely to blow your pots over during this type of firing and is completely overkill for what a potter wants to accomplish in a raku firing).
$175.00
Bracker's Good Earth Clays Repair Consult (START HERE!)
If you have just a Quick Question, need a double-check on what you think you need to do next, or if you just don’t know what to do or where to start, then this is the service for you. Just fill out and click ‘submit’ on the form below, then add this item to your shopping cart and complete your checkout. Don't worry, If we can immediately tell that you will need a longer virtual session or a full onsite service, your $15 service starter fee will be applied to that service. If you already know you will need more in-depth service, have a number of repair questions that need answers, or just need Dave to come onsite to give your equipment a once-over, then please choose our Virtual Repair or Diagnostic Services instead. WHAT TO EXPECT: Once your completed form is received, and the service has been paid, our techs will begin by gathering any additional information needed. Some times of the year are much busier than others, but we try to respond within 2 business days. They may ask questions of you via email or phone, provide directions for a test to be performed, or consult with the manufacturer if needed. They will then provide you with you with the answer to your question, or suggest a “next step”. Your ‘next step’ may be, a referral to a virtual consult, a link to (or a quote for), the appropriate parts (with a link to a video on how to install it yourself if available). It might be also be a quoted in-person repair, whichever is appropriate. Think of a Repair Consult as taking about 15 min of the tech’s time gathering information, doing any necessary research, and responding back with next steps or a quote. Once you receive that information, the repair consult is complete.
$15.00
Bracker's Good Earth Clays Service Drive time round trip drive time per hour
Please enter the time for a round trip as calculated by Google Maps between us and the destination. Because our website deals in whole numbers for the quantity, please round up to the nearest hour and we'll adjust it when we receive your order. Whenever possible, David will try to combine repair visits to the same area on the same day. If you have an emergency and need him as soon as possible, please add the Repair Tech Emergency Surcharge item to your order to move to the top of his docket when the parts are available.
$65.00
Bracker's Good Earth Clays Service options
Repair labor charge, per hour. Minimum of 1 hour Drive time billed on round trip
$215.00 - $595.00
Bracker's Good Earth Clays Shelf Cleaning Block
Use this silicon carbide kiln shelf cleaning block to remove glaze drips from kiln shelves. If glaze drips are left on a kiln shelf, they will melt again during firing and anything that comes into contact with it could stick to the shelf.
$18.50
Bracker's Good Earth Clays SlabMat - 14 wide X 50
SlabMat is the smooth alternative to canvas for rolling out slabs of clay. SlabMat is a proprietary non-woven material used instead of canvas for slab rollers, or rolling slabs with a rolling pin. Here are tips to help you enjoy SlabMat that much more. When cutting clay directly on SlabMat, a wooden or dull metal fettling knife is recommended. Use care to limit the sharpness of the cutting tool and the pressure applied while cutting to avoid permanent damage to the mat. For the smoothest slabs, use a SlabMat on both sides of the clay slab, with the smooth side of SlabMat touching the clay. One long piece of SlabMat may be used for small clay slabs, folded over itself with the clay sandwiched in between. If the mat becomes creased, the crease will be permanent. SlabMat can be used in conjunction with other materials (like heavy weight paper or fabric) to add defined texture to one side of a clay slab while keeping the opposite side totally smooth. If you encounter problems with SlabMat slipping on a slick surface, a piece of rubber shelf liner can be used underneath for added grip. If clay is sticking to SlabMat, your clay may be too moist. This can be easily remedied with a light dusting of cornstarch on the mat. Cornstarch reduces sticking and will burn off in the firing. Do not store your clay on SlabMat after use. Unlike canvas, the SlabMat can be used to roll multiple slabs in one studio session before becoming too saturated and causing clay to stick. Prolonged wetness may cause the SlabMat to become wavy but it can be dried between two pieces of sheetrock (drywall) to re-flatten. SlabMat will absorb stains from your colored clays. We recommend a set of mats for each color or type of clay used in your studio (white, red, porcelain, etc.) If you can roll your clay on canvas, you can roll your clay on SlabMat!
$16.00
Bracker's Good Earth Clays SlabMat - 16 wide X 22
SlabMat is the smooth alternative to canvas for rolling out slabs of clay. SlabMat is a proprietary non-woven material used instead of canvas for slab rollers, or rolling slabs with a rolling pin. Here are tips to help you enjoy SlabMat that much more. When cutting clay directly on SlabMat, a wooden or dull metal fettling knife is recommended. Use care to limit the sharpness of the cutting tool and the pressure applied while cutting to avoid permanent damage to the mat. For the smoothest slabs, use a SlabMat on both sides of the clay slab, with the smooth side of SlabMat touching the clay. One long piece of SlabMat may be used for small clay slabs, folded over itself with the clay sandwiched in between. If the mat becomes creased, the crease will be permanent. SlabMat can be used in conjunction with other materials (like heavy weight paper or fabric) to add defined texture to one side of a clay slab while keeping the opposite side totally smooth. If you encounter problems with SlabMat slipping on a slick surface, a piece of rubber shelf liner can be used underneath for added grip. If clay is sticking to SlabMat, your clay may be too moist. This can be easily remedied with a light dusting of cornstarch on the mat. Cornstarch reduces sticking and will burn off in the firing. Do not store your clay on SlabMat after use. Unlike canvas, the SlabMat can be used to roll multiple slabs in one studio session before becoming too saturated and causing clay to stick. Prolonged wetness may cause the SlabMat to become wavy but it can be dried between two pieces of sheetrock (drywall) to re-flatten. SlabMat will absorb stains from your colored clays. We recommend a set of mats for each color or type of clay used in your studio (white, red, porcelain, etc.) If you can roll your clay on canvas, you can roll your clay on SlabMat!
$10.00
Bracker's Good Earth Clays SlabMat - 22 wide X 50
SlabMat is the smooth alternative to canvas for rolling out slabs of clay. SlabMat is a proprietary non-woven material used instead of canvas for slab rollers, or rolling slabs with a rolling pin. Here are tips to help you enjoy SlabMat that much more. When cutting clay directly on SlabMat, a wooden or dull metal fettling knife is recommended. Use care to limit the sharpness of the cutting tool and the pressure applied while cutting to avoid permanent damage to the mat. For the smoothest slabs, use a SlabMat on both sides of the clay slab, with the smooth side of SlabMat touching the clay. One long piece of SlabMat may be used for small clay slabs, folded over itself with the clay sandwiched in between. If the mat becomes creased, the crease will be permanent. SlabMat can be used in conjunction with other materials (like heavy weight paper or fabric) to add defined texture to one side of a clay slab while keeping the opposite side totally smooth. If you encounter problems with SlabMat slipping on a slick surface, a piece of rubber shelf liner can be used underneath for added grip. If clay is sticking to SlabMat, your clay may be too moist. This can be easily remedied with a light dusting of cornstarch on the mat. Cornstarch reduces sticking and will burn off in the firing. Do not store your clay on SlabMat after use. Unlike canvas, the SlabMat can be used to roll multiple slabs in one studio session before becoming too saturated and causing clay to stick. Prolonged wetness may cause the SlabMat to become wavy but it can be dried between two pieces of sheetrock (drywall) to re-flatten. SlabMat will absorb stains from your colored clays. We recommend a set of mats for each color or type of clay used in your studio (white, red, porcelain, etc.) If you can roll your clay on canvas, you can roll your clay on SlabMat!
$22.50
Bracker's Good Earth Clays SlabMat - 30 wide X 50
SlabMat is the smooth alternative to canvas for rolling out slabs of clay. SlabMat is a proprietary non-woven material used instead of canvas for slab rollers, or rolling slabs with a rolling pin. Here are tips to help you enjoy SlabMat that much more. When cutting clay directly on SlabMat, a wooden or dull metal fettling knife is recommended. Use care to limit the sharpness of the cutting tool and the pressure applied while cutting to avoid permanent damage to the mat. For the smoothest slabs, use a SlabMat on both sides of the clay slab, with the smooth side of SlabMat touching the clay. One long piece of SlabMat may be used for small clay slabs, folded over itself with the clay sandwiched in between. If the mat becomes creased, the crease will be permanent. SlabMat can be used in conjunction with other materials (like heavy weight paper or fabric) to add defined texture to one side of a clay slab while keeping the opposite side totally smooth. If you encounter problems with SlabMat slipping on a slick surface, a piece of rubber shelf liner can be used underneath for added grip. If clay is sticking to SlabMat, your clay may be too moist. This can be easily remedied with a light dusting of cornstarch on the mat. Cornstarch reduces sticking and will burn off in the firing. Do not store your clay on SlabMat after use. Unlike canvas, the SlabMat can be used to roll multiple slabs in one studio session before becoming too saturated and causing clay to stick. Prolonged wetness may cause the SlabMat to become wavy but it can be dried between two pieces of sheetrock (drywall) to re-flatten. SlabMat will absorb stains from your colored clays. We recommend a set of mats for each color or type of clay used in your studio (white, red, porcelain, etc.) If you can roll your clay on canvas, you can roll your clay on SlabMat!
$37.50
Bracker's Good Earth Clays SlabMat Class Pack of 12 - 12 X 14
Economy 12×14 are the perfect SlabMat size for rolling out small plates or may be used as a work surface in a classroom setting. SlabMat is the smooth alternative to canvas. The non-woven surface is ideal for working on clay. SlabMats can be used as a handbuilding mat, or run through a slab roller. Measure your slab roller to make sure this size fits.This is a 12-pack of 12×14 sheets. SlabMat can also be customized in your studio with a blade and straight edge, cut to your desired size. Here are tips to help you enjoy SlabMat that much more. When cutting clay directly on SlabMat, a wooden or dull metal fettling knife is recommended. Use care to limit the sharpness of the cutting tool and the pressure applied while cutting to avoid permanent damage to the mat. For the smoothest slabs, use a SlabMat on both sides of the clay slab, with the smooth side of SlabMat touching the clay. One long piece of SlabMat may be used for small clay slabs, folded over itself with the clay sandwiched in between. If the mat becomes creased, the crease will be permanent. SlabMat can be used in conjunction with other materials (like heavy weight paper or fabric) to add defined texture to one side of a clay slab while keeping the opposite side totally smooth. If you encounter problems with SlabMat slipping on a slick surface, a piece of rubber shelf liner can be used underneath for added grip. If clay is sticking to SlabMat, your clay may be too moist. This can be easily remedied with a light dusting of cornstarch on the mat. Cornstarch reduces sticking and will burn off in the firing. Do not store your clay on SlabMat after use. Unlike canvas, the SlabMat can be used to roll multiple slabs in one studio session before becoming too saturated and causing clay to stick. Prolonged wetness may cause the SlabMat to become wavy but it can be dried between two pieces of sheetrock (drywall) to re-flatten. SlabMat will absorb stains from your colored clays. We recommend a set of mats for each color or type of clay used in your studio (white, red, porcelain, etc.) If you can roll your clay on canvas, you can roll your clay on SlabMat!
$40.00
Bracker's Good Earth Clays Slip trailing syringe set
A foam holder with 6 syringe cartridges, caps, and tops. Screw-on tips are sold separately in sets of 6.
$40.00
Bracker's Good Earth Clays Sodium Silicate
Na2SiO3 Deflocculant, De-flocculant Formula: Na2SiO3 Alternate Names: Waterglass OXIDE ANALYSIS FORMULA Na2O 50.78% 1.00 SiO2 49.22% 1.00 Density (Specific Gravity) 2.40 Melting Point (MP) 1080°C The most popular deflocculant used in casting slips for many years. It is nearly always used with soda ash (when employed alone it can make a slip 'stringy' and thixotropic). The material is effective, reliable and inexpensive. However, it attacks the plaster in molds much more than more modern deflocculants and it is easier to over-deflocculate a slip with sodium silicate. There are potassium based deflocculants that are similar to the corresponding sodium ones. They can be employed where the presence of sodium is undesirable. Soda ash is more suitable for deflocculating glazes. In addition, a wide range of organic deflocculants are available as alkali salts of pyrogallic, humic or tannic acids. They have long working ranges and can increase the apparent plasticity of the clay. As noted, their use prolongs mold life compared with sodium silicate and soda ash and they are less prone of over-deflocculation. Tetramethylammoniumhydroxide is also an organic compound that is used where residues from inorganic salts cannot be tolerated. It is a strong base that can even attack glass and quartz. Also used as a binder in ceramic bodies. ~ from Digitalfire Ceramic Materials Database
$14.00 - $19.00
Bracker's Good Earth Clays Soft Insulating Firebrick - K26 9 straight (Case of 25)
K26 bricks - capable of temperatures up to 2600°F (1427°C) Individual soft insulating firebrick dimensions: 9" x 4.5" x 2.5" sold as a case of 25 bricks. Soft insulating fire bricks (IFB) are used for general kiln construction because they are lightweight and easy to cut without the use of special saws or tools. Also used as a heat-resistant surface for metal soldering and to fire PMC+, PMC3.
$250.00
Bracker's Good Earth Clays Soft Insulating Firebrick - K26 9 straight (individual)
K26 bricks - capable of temperatures up to 2600°F (1427°C) Individual soft insulating firebrick dimensions: 9" x 4.5" x 2.5" Soft insulating fire bricks (IFB) are used for general kiln construction because they are lightweight and easy to cut without the use of special saws or tools. Also used as a heat-resistant surface for metal soldering and to fire PMC+, PMC3.
$15.00
Bracker's Good Earth Clays Summer Succulents
You don't have to know any math to put together a handbuilt geometric planter. The MKM disk in this kit will do all of your calculations for you, and the Dirty Girls Slab Bevel tool will make sure your angles fit together nicely. This kit includes both, plus our Bracker's Lil Chizler rib with its multiple angles and surfaces shaping and smoothing, and a handful of our little freebie tools which are great for cutting and scoring your slabs. Start by making a simple triangular prism planter, and then try your hand at some poly-hedrons! Kit contains: Set of 2 MKM Decorating Disks Dirty Girls Slab Bevel Tools Bracker's Lil Chizler 1/2 bag of Buff Plus Clay Your choice of summer themed underglaze transfer
$80.00 $75.00
Bracker's Good Earth Clays Synthetic Round Sponge
The synthetic round sponge is a favorite of Danny Meisinger, Second Saturday Artist for December 2008 (our very first Second Saturday Artist!) and December 2012.
$0.60
Bracker's Good Earth Clays Synthetic Wedge Sponge
The synthetic wedge sponge is a favorite of Danny Meisinger, Second Saturday Artist for December 2008 (our very first Second Saturday Artist!) and December 2012.
$0.30
Bracker's Good Earth Clays The Steve Tool
The Steve Tool is a texture application tool. It is a re-invention of the wheel designed specifically for clay. It doesn’t clog easy so you get lots of raw texture! Use the tool to apply texture to thrown or hand built work. View/download a 7 page how-to guide with step-by-step photos It works for hand building or sculpting as well as thrown pieces. One tool can be configured many ways for many different texture results. You receive in the same tool kit BOTH the gear style and spoke style texture disks. To use The Steve Tool, throw a cylinder. Scrape the side clean with a rib. Roll the texture wheels around the spinning cylinder & move slowly up the cylinder (or fast, your choice). For slab work (or breads) flatten out the material and roll on texture. After texture is applied, form the shape from only the inside of the cylinder. You’ll see how the texture becomes “part of the pottery” & not simply “applied texture” which is how texture looks when applied to a finished pot. You’ll see patterns mimic nature. The patterns add to the tactile feel of your pottery. Stretch the pottery until the walls get very thin & you’ll feel the texture come through to the inside of the pottery. You’ll be inspired to try other effects from texture work. Try filling in the texture with contrasting clay, then trim smooth at the leather hard stage. Try texture on thick or thin wall cylinders. The Steve Tool readily pays for itself in the first pot sold! Textured surfaces can add another layer of interest to your shapes and also control runny glazes. You'll be capable of producing hundreds of surface affects on wheel thrown pottery or hand built claywork! No more stealing toys from the kitchen! The same Steve Tool can be configured into many variant designs by rearranging the disks over the shaft in assorted patterns. Loosen the nuts, adjust the plastic disks into alternate locations & retighten the nuts. It's just a wheel, so let it spin. Use it for pastry? Why not? We steal from the kitchens, why not start using a pottery tool for pies, pastries, etc? It's only right...
$19.00
Bracker's Good Earth Clays Type K 8 Gauge Thermocouple
Type K thermocouples are the most common type of thermocouples used in electric kilns. These thermocouples are purchased in bulk directly from the factory to save you money. The manufacturer is ISO/IEC 17025 certified.
$14.00 - $20.00
Bracker's Good Earth Clays Ultimate Edger
Frequently referred to as "The Ninja Tool" by potters in the Kansas City Metro clay community, thanks to people taking classes at the KC Clay Guild. We don't know exactly who originally coined the term, but I remember a customer who stopped by several years ago, looking for "The Ninja Tool." None of us knew what the customer was talking about, so the customer described it: metal, hills and valleys on the edges, looks like a fancy version of a throwing star…. After that description, we knew the nickname would stick forever! Introduced at NCECA in 2004, the Ultimate Edger is a versatile and unique tool for both throwing and handbuilding. Built of 20 gauge stainless steel and produced right here in the USA, this tool will last you a very long time. The Ultimate Edger comes in two sizes, Small and XL. Both tools are the exact same except for the fact that one is simply larger than the other for use on different sized projects. The tool has six perfectly placed edges, with a total of five completely different designs for versatility. A – Creates double edge on bottom of pot. B/D – Used to round out square edge on lip of pot. C – Used to create raised design on lids and pots. E – Creates single edge on bottom of pot. F – Can be used to create a round edge on a large pot. Specifications Ultimate Edger: 4.25″ × 2″ Ultimate Edger XL: 5.25″ × 2.375″ Image shows both the Ultimate Edger and the Large Ultimate Edger. T A good rule of thumb is if you make casserole-sized items, or pots from 10-15# of clay, the Ultimate Edger would be appropriate for your needs. If you make larger items or prefer to make items with thicker walls and lips, then the Large Ultimate Edger would be more suited to your needs.
$12.99
Bracker's Good Earth Clays Underglaze Pencil
6 Colors available. Underglaze pencils will fire to Cone 6, some colours will go to cone 10. Testing suggested.
$10.00 - $14.00
Bracker's Good Earth Clays Virtual Repair, 30 min
Do you have a kiln or wheel that is misbehaving, but you don’t live close enough for Dave to come fix it? Do you need help with installing a new part or running a test on your kiln? Do you have more questions about your equipment than a basic consult covers, or need more in-depth information? Are you willing to work with Dave over zoom to do a diagnostic, and you have basic hand tools? If you answered YES to any of the above questions, then this is the right service for you! Just fill out the form below (please be as specific as possible), click submit, add this item to your shopping cart, and complete your checkout process. This is the ‘next step up’ from a basic consult. You get the same great Dave service and access to his years of knowledge and experience* but brought to you by the magic of technology, rather than the magic of the combustion engine and the industrial revolution. *More than 25 years of experience and multiple certifications in ceramic equipment repair ensure that Dave is the go-to-guy for anything kiln or wheel-related….(plus slabrollers, pugmills, mixers and more) What to Expect: We know that your equipment is important to you, and a broken wheel or kiln can cause a lot of stress. Physical and virtual repairs are scheduled on a first-come-first-served basis, Mon-Fri from 9am-4pm Central time. Rest assured that we will strive to schedule your virtual appointment as soon as possible, and we will work with you to find a time/date that works for both of us. [Often, virtual repair services are faster to schedule as they do not require Dave to drive to your location]. We offer both remote diagnostic consultations and remote part installation walk-throughs priced in fifteen minute increments, to fit the needs of your ceramic equipment. Basic Remote Diagnostic : $25* for the first half-hour$10 per 15 minute increments thereafter30 min minimum *NOTE: This fee must be paid prior to your appointment. In the event that your issue can not be effectively diagnosed remotely, the fee will be pro-rated/refunded or applied to a physical service call, as applicable. Service Description: Our remote diagnostic service is a one-on-one phone call or video chat (via Facetime, Zoom, or Google Meet) with Dave. We can schedule diagnostic appointments for a variety of equipment including, gas and electric kilns, wheels, slab rollers, and pugmills. If your diagnostic is electric kiln-specific, please perform a glow test prior to talking with Dave. Include the results of your glow test along with the brand, model, and type of equipment you need serviced in the email when you schedule your diagnostic appointment. During the diagnostic, Dave may need you to open the panel to show him something, so please make sure you have a Phillips head screwdriver and a flat head screwdriver handy during the call. Once your virtual call is done, the virtual repair is complete. Remote part installation walk-through, or in-depth repair question and answer session $50/hour billed in 15 min incrementshalf hour minimum *NOTE: Based on the model and part installation, you will be given a time estimate and price quote for remote installation assistance. This amount will be collected up front. In the event that the repair is completed in less time, any excess will be refunded, if it takes longer, the balance will be charged to your credit card at the end of the repair session. Service Description: Our remote part installation service is a one-on-one video call (on Facetime, Zoom, or Google Meet) with Dave. Prior to your appointment, we will need to verify that you have the correct part and all the correct tools to service your equipment. Please include your list of tools and part(s) along with the brand, model, and type of equipment you need serviced in the email when you schedule your remote part-installation walk-through. For a detailed list of what tools you may need for kiln maintenance, please click here. (You won’t need the multi-meter for parts installation, so don’t worry if you don’t have one) Once your virtual call is done, the virtual repair is complete. NOTE: Virtual Kiln/Wheel Repair services are specifically for equipment repairs. If you need advice on how to load a kiln or how to fire ceramics, check out our Consultation Services This initial fee must be paid prior to your appointment. The fee will be refunded in full or applied to a physical service call if we cannot diagnose the problem with your equipment.
$25.00
Bracker's Good Earth Clays XLarge Ultimate Edger
Frequently referred to as "The Ninja Tool" by potters in the Kansas City Metro clay community, thanks to people taking classes at the KC Clay Guild. We don't know exactly who originally coined the term, but I remember a customer who stopped by several years ago, looking for "The Ninja Tool." None of us knew what the customer was talking about, so the customer described it: metal, hills and valleys on the edges, looks like a fancy version of a throwing star…. After that description, we knew the nickname would stick forever! Introduced at NCECA in 2004, the Ultimate Edger is a versatile and unique tool for both throwing and handbuilding. Built of 20 gauge stainless steel and produced right here in the USA, this tool will last you a very long time. The Ultimate Edger comes in two sizes, Small and XL. Both tools are the exact same except for the fact that one is simply larger than the other for use on different sized projects. The tool has six perfectly placed edges, with a total of five completely different designs for versatility. A – Creates double edge on bottom of pot. B/D – Used to round out square edge on lip of pot. C – Used to create raised design on lids and pots. E – Creates single edge on bottom of pot. F – Can be used to create a round edge on a large pot. Specifications Ultimate Edger: 4.25″ × 2″ Ultimate Edger XL: 5.25″ × 2.375″ Image shows both the Ultimate Edger and the Large Ultimate Edger. T A good rule of thumb is if you make casserole-sized items, or pots from 10-15# of clay, the Ultimate Edger would be appropriate for your needs. If you make larger items or prefer to make items with thicker walls and lips, then the Large Ultimate Edger would be more suited to your needs.
$14.99