Welcome to our new site. We hope you enjoy it. We are in our final testing to make sure everything is ready for you to come and SHOP. Look around all you like, we'll be officially open over here 12/26/24!

Lilac Underglaze

Description

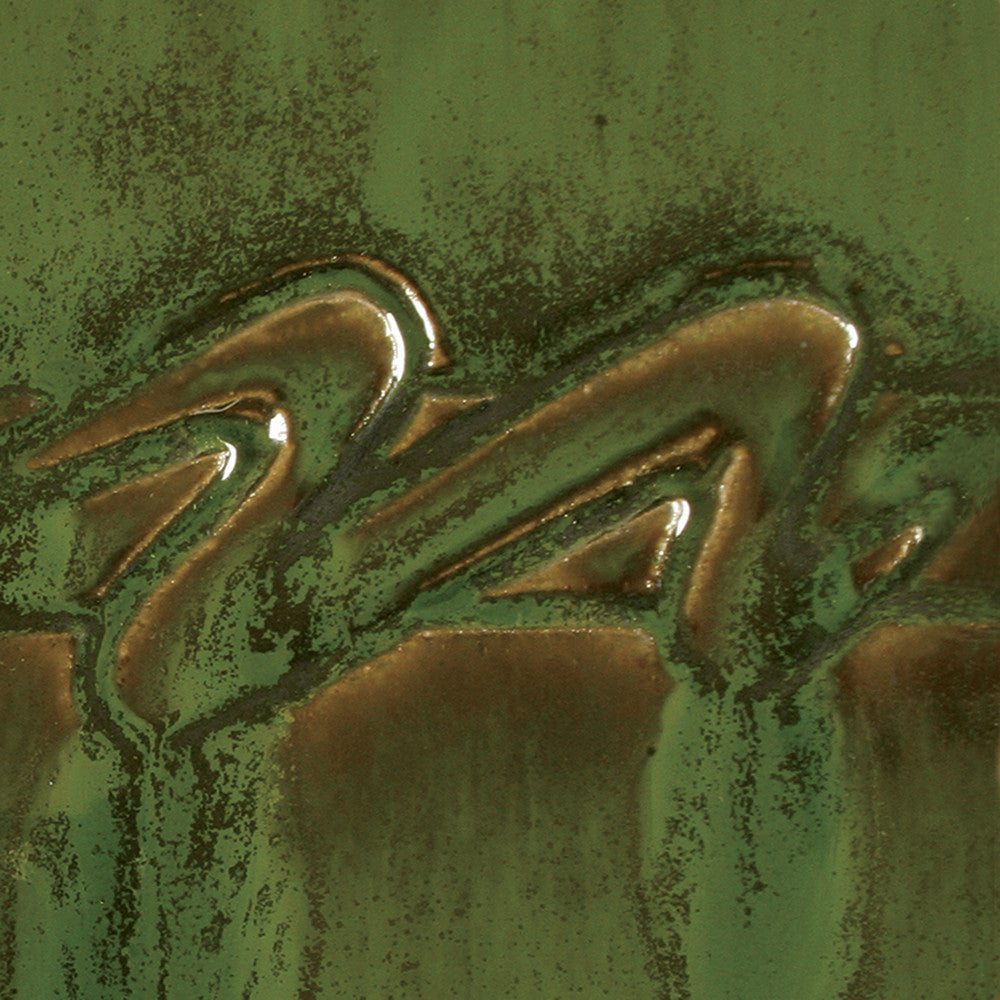
Cone 06 oxidation (first photo): Lilac will fire matte without addition of a clear glaze. To intensify color or for use on dinnerware, apply clear or matte clear glaze.

Cone 6 oxidation (second photo): Color lightens. Recommended clear glaze is SW-001 Stoneware Clear.

Cone 10 reduction (third image): Color fades. Recommended clear glaze is SW-001 Stoneware Clear.

Product form

Cone 06 oxidation (first photo): Lilac will fire matte without addition of a clear glaze. To intensify color or for use... Read more

Free pickup in our shop(s)

SKU: MGUGS092

$4.75

8 in stock

        Quick Reference

      Series: Mayco Fundamentals

      Firing Range: Cone 06-04 Basic Low Fire , Cone 04-2 Extended Low Fire, Cone 4-5 "Safe" Mid-Fire, Cone 5-6 Mid-Fire, Cone 6-8 Extended Mid-Fire, and Cone 8-10 High Fire

      Finish:

      Color: Purple

      Surface:

      Download Safety Data Sheet as a PDF

      Description

      Cone 06 oxidation (first photo): Lilac will fire matte without addition of a clear glaze. To intensify color or for use on dinnerware, apply clear or matte clear glaze.

      Cone 6 oxidation (second photo): Color lightens. Recommended clear glaze is SW-001 Stoneware Clear.

      Cone 10 reduction (third image): Color fades. Recommended clear glaze is SW-001 Stoneware Clear.

      Resources

      Fundamentals Brochure
      Mayco Glaze Use

      Jump to Sections: Fundamentals Stroke & Coat Foundations Elements   Stoneware Glazes

      Fundamentals

      Shake well. Apply 2-3 coats to wet clay, greenware, or cone 04 bisque for use in design or solid coverage. Fundamentals® have a firing range from cone 06 to cone 10. If the form you are painting has texture, dab excess color out of the texture, and never allow the glaze to pool in the texture. To intensify color or for use on dinnerware, apply a clear or matte clear glaze. For use on clay or greenware, apply underglaze, allow to dry, and fire to cone 04. If desired, apply clear glaze and re-fire to cones 06-05 for earthenware and cone 5-10 for stoneware (998°C–1285°C). For use on bisque, apply to cone 04 bisque, apply clear glaze if desired and re-fire earthenware to cone 06/05 and cone 5-10 for stoneware. Generally, a clear glaze finish is applied to bring out the true color and vividness of the product. We recommend S-2101 Clear for low-fire and SW-001 Stoneware Clear Glaze unless noted SW-004 Zinc-Free Clear for mid-range.

      Jump to Sections: Fundamentals Stroke & Coat Foundations Elements   Stoneware Glazes

      Stroke & Coat

      One coat of Mayco Stroke & Coat® will create a translucent finish with subsequent coats adding opacity. We suggest 2-3 coats for full opacity and all over coverage. Let dry between coats. Stroke & Coat® glazes will fire to a gloss finish without clear glaze. However, if desired, a clear glaze (such as NT-CLR Clear One Dipping Glaze or S-2101 Crystal Clear Brushing) can be added. For application on wet or leatherhard clay and firing to cone 04, colors will retain their vibrancy with huge time savings. We recommend leaving an area unglazed, such as the back or bottom of the unfired piece, to allow for out-gassing of the clay during the single-firing process. Limit glazes to 2 coats including design work.

      Jump to Sections: Fundamentals Stroke & Coat Foundations Elements   Stoneware Glazes

      Jungle Gems

      Crystal glazes were designed to mature at cone 06/05. Shake the jar well and stir during the application process. Apply two to three even coats to shelf cone 04 bisque with a fan brush, allow to dry between coats. We recommend a soft fan brush, such as CB-604 #4 or CB-618 #8 Soft Fan, for glaze application. Stir frequently as crystals tend to settle in the jar due to their weight. Re-distribution of crystals may be required during the final coat. Where you see the crystal is where you will see it bloom. Avoid heavy application of crystals at the bottom of ware as the crystals bloom and can adhere to the kiln shelves or stilts. The crystals in the glaze will melt when fired, which may create a textured surface. Jungle Gems™ Crystal Glazes have a natural crazing that occurs when the crystals “bloom”. As that surface may be difficult to properly clean if in contact with food, we recommend crystal glazes to be used on decorative ware.

      Jungle Gems™ Crystal Glazes have been formulated to mature at cone 06/05. However can be fired at higher temperatures. Their performance at cone 6 is noted on each individual product label. Crystals tend to flow at higher temperatures so take care on vertical pieces. We recommend testing on your clay body and in your kiln prior to use.

      Jump to Sections: Fundamentals Stroke & Coat Foundations Elements   Stoneware Glazes

      Foundations

      Shake for 5-6 seconds before use. Dispense glaze onto a palette (tile, plate, etc.) and apply with your brush or decorating accessory of choice (sponge, stamp, etc.). Foundations® glazes were designed to mature at a shelf cone 06/05. Apply 2-3 coats, on cone 04 bisque, allowing surface to dry in-between coats. Foundations® dries quickly and speeds up your ability to handle or perform additional decorating. Glaze fires to high-gloss finishes (excludes mattes), therefore does not need to be clear glazed. When applying to a large surface, we recommend a broad, soft brush such as CB-604 #4 Soft Fan. Try to get the brush fully saturated (loaded) and apply each coat in the same direction to minimize brush marks.

      Foundations® have been formulated to mature at cone 06/05. However most will maintain their color at higher temperatures. Their performance at cone 6 is noted on each individual product label. We recommend testing on your clay body and in your kiln prior to use.

      Jump to Sections: Fundamentals Stroke & Coat Foundations Elements   Stoneware Glazes

      Elements & Element Chunks

      Shake for five to six seconds before use. Dispense glaze onto a palette (tile, plate, etc.) and apply with a soft brush or decorating accessory of choice (sponge, stamp, etc.). Dipping your brush directly into the jar may contaminate the jar’s contents, especially if you are using other glazes. Apply three to four coats to your piece. Elements™ glazes were designed to mature at a shelf cone 06 (999° C or 1830º F). When applying them over a large surface area, we recommend a broad, soft fan brush.

      Moisten the brush with water first. The brush fully saturated (loaded) and each coat applied in the same direction. When the wet look has gone from the first coat, you may apply the next coat of glaze. Be sure the glaze has dried thoroughly prior to firing. A medium ramp/firing rate is recommended (250°F per hour) at shelf cone 06. Elements™ can be fired at higher temperatures but will change in appearance. We recommend testing prior to use.

      Jump to Sections: Fundamentals Stroke & Coat Foundations Elements   Stoneware Glazes

      Stoneware Series

      Stoneware Classic & Matte Glazes: Stir well. Apply to soft-fired bisque (cone 04/06). Apply one, two or three coats depending on the result desired. Allow each coat to dry before applying the next coat. Fire from cone 5/6-10. See label for additional firing information for individual glazes and cone 10 performance.

      Stoneware Crystal Glazes: Crystal glazes are designed to expand upon the surface with dazzling bursts of color. Crystals will settle to the bottom of the jar and will need thorough mixing prior to initial use and in between each coat. Apply two to three coats using a fan or hake brush. While the glaze is wet, use your brush to redistribute crystals to achieve balanced coverage. Over application of the crystals can cause pinholing or running. Avoid placing crystals near the bottom third of a vertical piece as they may cause additional movement during firing. See label for additional firing information for individual glazes and cone 10 performance.


      Stoneware Gloss Glazes: Stoneware Gloss glazes can be used in design, all over coverage and are the ideal product for intermixability at mid-range temperatures. The integrity of your design will remain unchanged as these glazes are incredibly stable and will not move or combine with surrounding colors. See label for additional firing information for individual glazes and cone 10 performance.

      Dry mix products: Always wear a NIOSH-approved respirator when handling dry glazes. Gently tumble unopened bag to redistribute material, Sieving is not necessary. Mix one 10Ib bag of Dry material into at least 10 pints of water. Stir thoroughly. Add additional water until desired Specific Gravity is reached. Specific Gravity preference will vary between studios, persons, and practice. Our recommended Specific Gravity is in the range of 1.47-1.51. This is for a 1 second dip time; you may want to mix to a lower Specific Gravity if you layer your glazes or tend to dip longer. Stir well before each use. We suggest using dipping tongs. Immerse the ware for 1-2 seconds. One dip of Mayco Dry is equivalent to 3 coats. Shake excess glaze off gently. Allow the glaze to dry before applying additional coats, if desired. When applying Stoneware Dry Crystal glazes, use a cup or ladle to pour the glaze over your piece. While the glaze is wet, you may use a fan brush to evenly distnb­ute the crystals; avoid heavy crystal loading on the bottom 1/3 of your piece. Fire to preferred temperature, cones 5-10 (2167°F-2345°F / 1186°C-1285°C). Testing recommended. The choice of clay body, the thickness of glaze application, the firing process, and temperature will affect the fired results.

      Tip: Save your bag or log the lot number for if you have any questions for our technical team. Tip: Apply AC-302 Wax Resist to the bottom for easy dry foot clean-up.

      Recently viewed products

      © 2024 Brackers Good Earth Clays, Powered by Shopify

        • American Express
        • Apple Pay
        • Diners Club
        • Discover
        • Google Pay
        • Mastercard
        • PayPal
        • Shop Pay
        • Venmo
        • Visa

        Login

        Forgot your password?

        Don't have an account yet?
        Create account