


Serenity Spiral Texture Mats
Serenity Spiral Texture Mats
Share this product
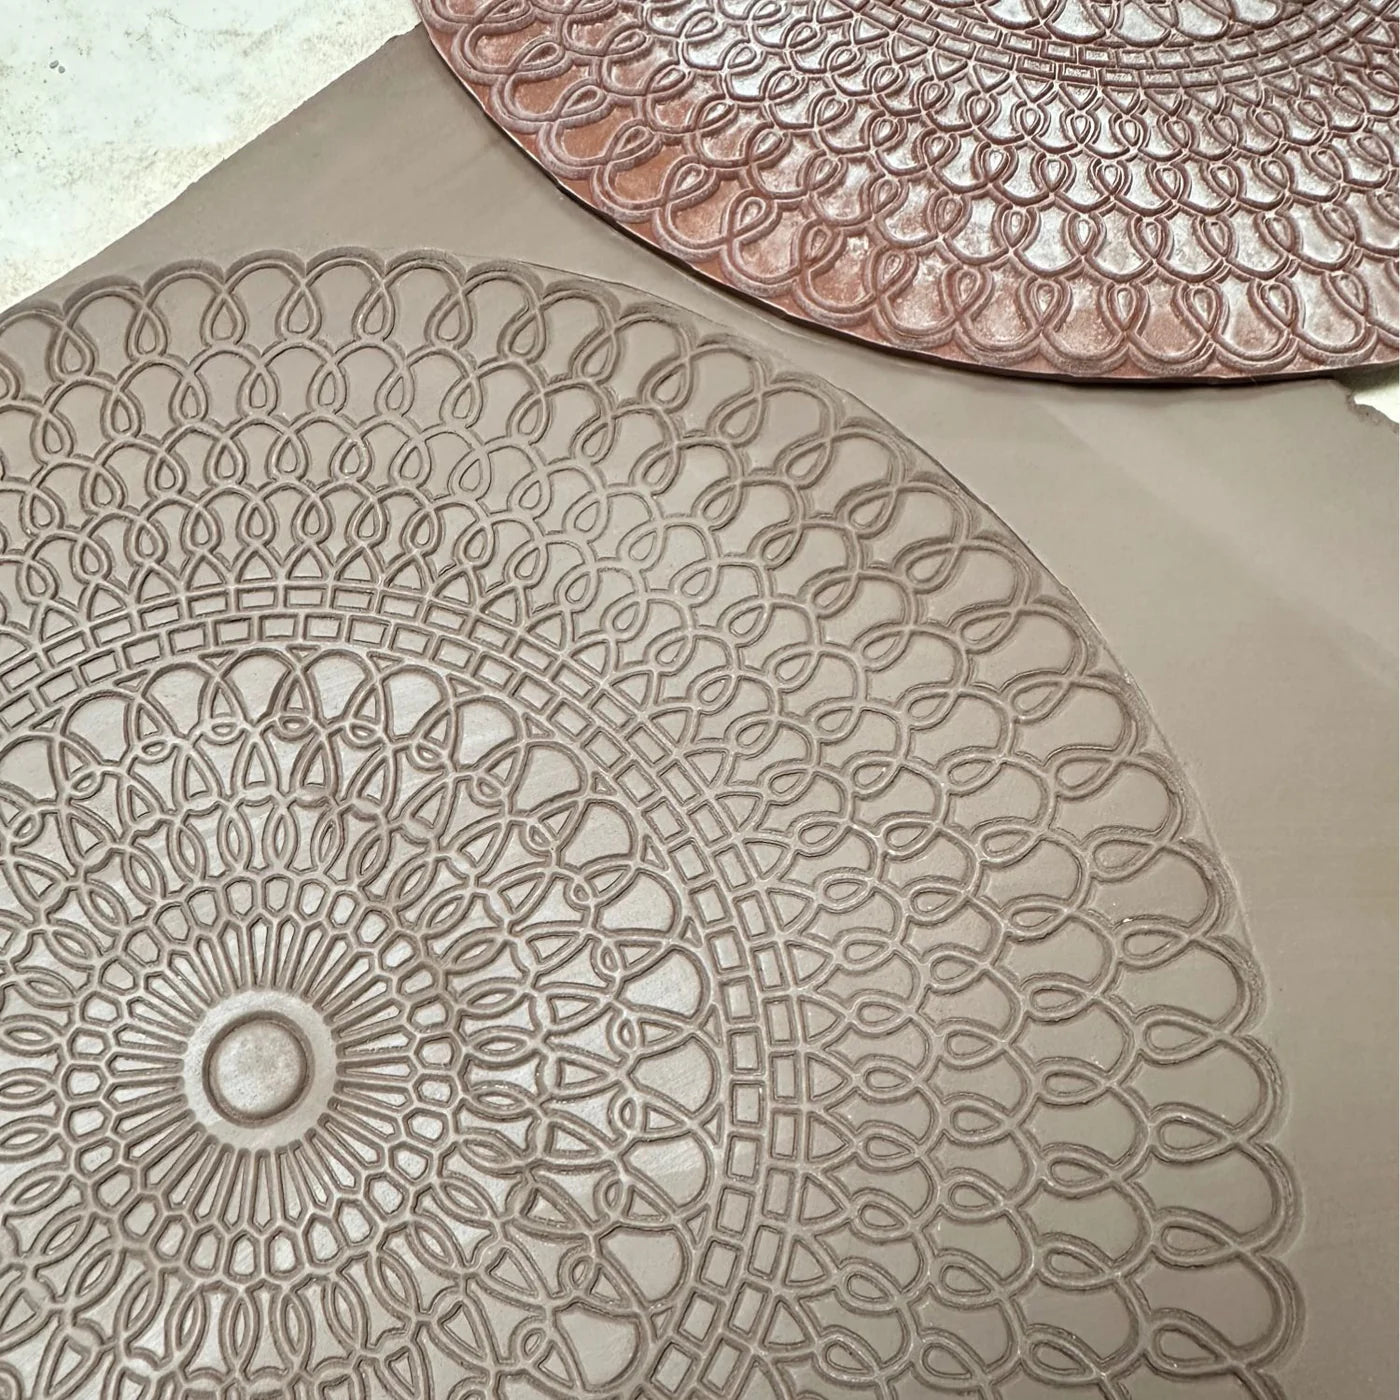
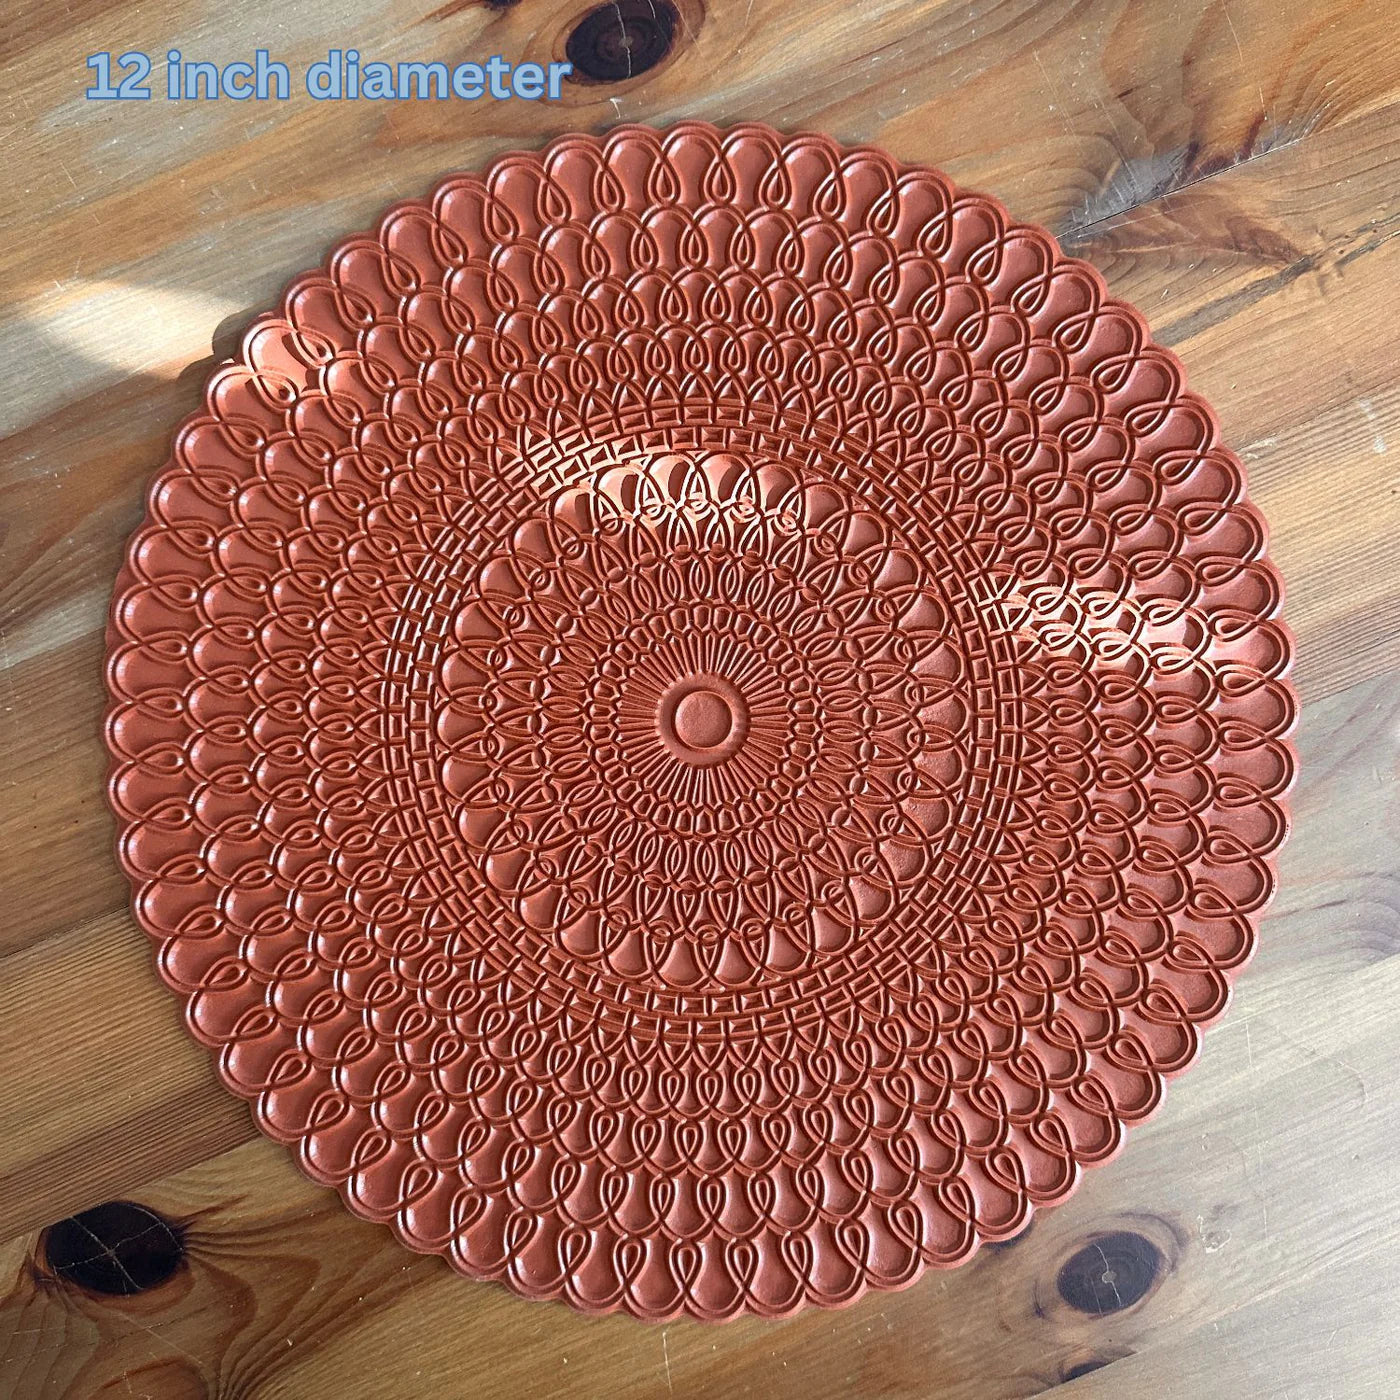
These are high quality, hand pressed, natural rubber texture mats. You will not be disappointed with the quality of these texture mats.
What really makes these texture mats stand out is that the mandala pattern itself is NOT recessed, or debossed, into the clay. The outline of the mandala is the part that is recessed/debossed. Hard to explain in words, super easy in pictures. See product photos to the left for details. It's a great effect that has been especially attention-grabbing for our early testers of these mandala texture mats.
Hurry up, only 3 items left in stock.
Your payment information is authorized at checkout, your order is then reviewed by staff, and your payment is processed securely after your order is confirmed. We do not store credit card details nor have access to your credit card information.